Friday, October 24, 2014

PerformancePoint Services error code 20700 - Resolved

I was working with Performance Point 2010 application and I got this following error. The performance point application was pointing to a SSAS cube and it was configured to refresh now and then.
Following error was displayed in the event viewer.


I checked the permissions of the page in which the aforementioned error was appearing and nothing has changed. I checked whether something has changed in cube, but nothing appears to be.  Finally I altered the data connection in performance point dashboard designer to point to some other cube(as a precautionary measure) and then back to the original cube.

Then things have started working. Hope this helps you!!!

Saturday, October 18, 2014

Correlation ID - Not found in the ULS logs - Resolved

We are in the process of migrating SharePoint 2010 to SharePoint 2013 using Content DB detach and attach method. After attaching the content DB , when we browsed the default.aspx, we were getting "File not found" error , but the Correlation ID could not be found anywhere in the ULS (even after setting the logging level to verbose).

Finally in the web.config file and did the following settings

1) Set CallStack=True
2) Set Debug = True
3) Set CustomError= OFF

These settings helped me to see the yellow screen of death. After right clicking this screen -> View Source, I was able to see the exact error. Hope this helps you!!


Sunday, October 12, 2014

Create a site collection in SharePoint 2013 with SharePoint 2010 user experience

In my organisation there is a need that we need to create a  site collection in SharePoint 2013 with SharePoint 2010 user experience. Here are the steps to accomplish it.

Step 1:
Create/Use a web application in SharePoint 2013.

Step 2:
Open CA->Application management -> Create Site Collections. After filling out the Title and URL , there is a template section and choose Select Experience Version as 2010.

I created a publishing site template and it looks like SharePoint 2010 publishing template.

There will be a notification which will request you to experience what SharePoint 2013 to offer. Click on Remind me later and then you are good to go using the site collection with SharePoint 2010 user experience.


Hope this helps you !!!

Monday, October 6, 2014

PowerShell - Microsoft SharePoint is not supported with version 4.0.30319.18063 of the Microsoft .Net Runtime - Resolved

We tried to Install SPDiag 3.0 for our SharePoint environment, which provides SharePoint administrators with a unified interface that can be used to gather relevant information from a farm,

It also displays the results in a meaningful way, to identify performance issues, and share or export the collected data and reports.


When we tried to create a project , it was throwing the following error.


The error message was " Microsoft SharePoint is not supported with version 4.0.30319.18444 of the Microsoft .Net Runtime".

I did try to change the Psconfig.exe.config to point to .Net 2.0 and it did not solve the problem. So finally decided to uninstall Microsoft Windows Management framework 3.0 from installed windows updates.

After uninstalling , things started working. Hope this helps you.


SharePoint 2010 - Remote Blob Storage Impersonation issue - Resolved

When we configured RBS in our test environment as per this technet arcticle , but when we tried to upload documents, we were unable to upload documents. Further increasing the logging to Verbose we found the following error in ULS log.

Exception thrown storing stream in new SqlRemoteBlob: System.Reflection.TargetInvocationException: Exception has been thrown by the target of an invocation. ---> Microsoft.Data.SqlRemoteBlobs.RemoteBlobStoreException: The blob store <FilestreamProvider_1> threw an exception. The exception thrown is saved in InnerException. ---> System.ComponentModel.Win32Exception: Either a required impersonation level was not provided, or the provided impersonation level is invalid.

We did so many things without success and finally found this blog which states that the version of the operating system on all the servers in the farm should be identical.

Seconding that , our test environment , the SharePoint environment was on Win 2008 Enterprise SP2 and the DB server was on Win 2008 R2 Enterprise SP1. Hence decided to Install and Configure RBS in another farm where SharePoint environment was on Win 2008 R2 Enterprise SP1 and DB server was on Win 2008 R2 Enterprise SP1.

After installing/configuring RBS, we are able to upload documents and RBS is working like a charm.

Note: OOTB you cannot upload documents which is greater that 2GB when RBS is enabled.

Hope this helps you

Sunday, October 5, 2014

Installing and Configuring PowerPivot in SharePoint 2010

As I had to install and configure PowerPivot in my new farm, I thought that I can share the steps with you.

Pre-Requisites:

1) Must have one or more SharePoint web applications that are configured for classic mode authentication.

2) PowerPivot data access will only work if the web application supports classic mode authentication.

3) SharePoint 2010 SP2 must be installed before you can configure PowerPivot for SharePoint.

Installation Steps

Step 1) Mount the SQL Server Installables in the SharePoint farm's app server or any other server that is in which you want to install PowerPivot. Run the Setup.exe , it will launch SQL Server Installation Center and click on Instalation -> New Installation or add features to an existing installation.

Step 2) You have to install , Setup Support files, and click Install. Make sure you correct the failures.
Step 3)Choose Installation Type as New Installation and add shared features enter the Product Key  accept License Terms and Click Next.

Step 4)Now in the Setup Role choose SQL Server PowerPivot for SharePoint -> Add PowerPivot for SharePoint to -> Existing Farm and Click Next.
Step 5)In this step , you will see pre-selected features and Click Next,
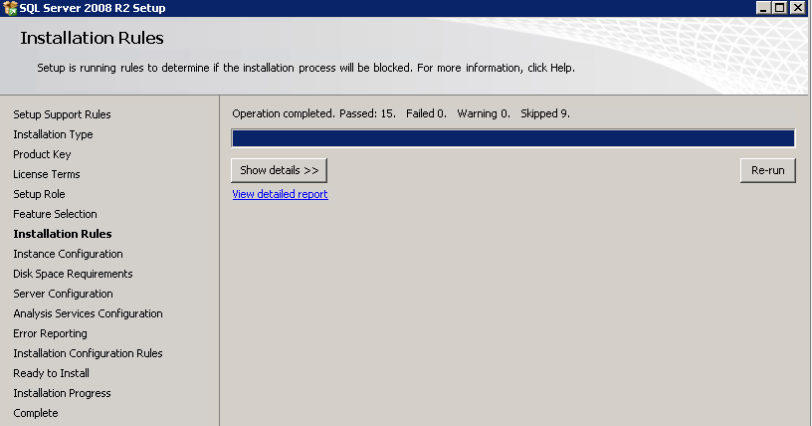
Step 6) Installation Rules will run and make sure you correct the failure and Click Next
Step 7) In the Instance Configuration screen  you might want to accept the default named instance and instance ID. Click Next.

Step 8) It will check for Disk Space Requirements and Click Next.

Step 9) In this step, make sure you provide a dedicated domain account for SQL Server Analysis Services. If you try to provide built in domain accounts the wizard will not accept it. Click Next.
Step 10) In the Analysis Services Configuration screen specify your Analysis Services administrators(they will have unrestricted access to Analysis services).  In the Data Directories and make necessary drive changes. Click Next 
Step 11) Error Reporting screen will appear. Click Next. 
Step 12) In the Installation Configuration screen , make sure you do not have any errors. Click Next

Step 13) In the Ready to Install screen, review the content and click on Install. Installation will continue and you might be asked to restart the server. 

Configuration Steps

Step 1) Once the installation is completed , launch CA -> System Settings > Manage services on server and check the SQL Server Analysis Services and SQL Server PowerPivot System Service are started. Also make sure  Claims to Windows Token Service and Secure Store Service are started.


Step 2) Launch CA -> System Settings > Farm Management > Manage farm solutions. There will be two solutions Powerpivotfarm.wsp and Powerpivotwebapp.wsp. Out of which Powerpivotfarm.wsp is globally deployed. The powerpivotwebapp.wsp is only deployed to SharePoint CA and you have to manually deploy  Powerpivotwebapp.wsp to the web application in which you want to have PowerPivot. 
Step 3) Creating the PowerPivot Service Application
Launch CA ->Application Management -> Service Applications- > Manage service applications. Click on New and select SQL Server PowerPivot Service Application.
Make sure that the “Add the proxy for this PowerPivot service application to the default proxy group” is checked.


Step 4) Configure Excel services and Secure Store. I have configured Excel services and Secure Store Services earlier , but there are lot of articles available for this.  

Step 5)  In your SharePoint Site-> SiteActions->Site Settings > Site Collection Administration > Site Collection Features-> Activate the PowerPivot Feature Integration for Site Collections feature.


You might want to check Step2 (To deploy Powerpivotwebapp.wsp to your  SharePoint Site) before doing this step.

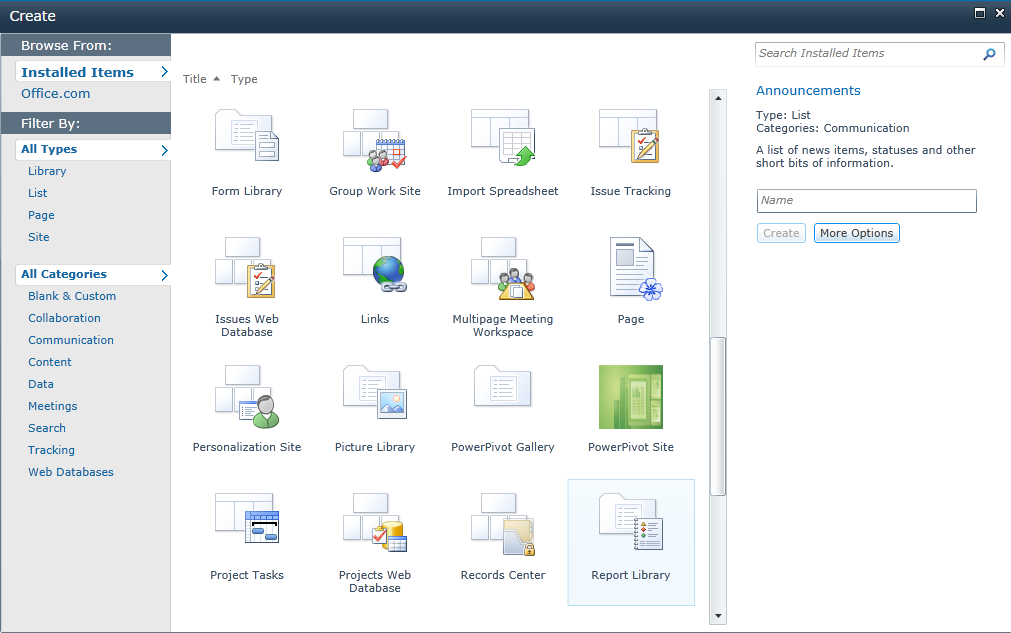
Step 6) In your SharePoint Site ->SiteActions->More Options->Choose PowerPivot Gallery and upload the Pivot Sheets and let the users use it.

Hope this helps you!!!